Our kitchen and dining room occupy a converted stable (étable). Although the roof has been replaced and benefits from 21st century materials, the supporting construction is the original system of beams (poutres) and posts (poteaux). It dates from the early 19th century or earlier.
It’s a real pleasure to look up and admire the oak timbers (bois en chêne) that were slotted into place with such immense effort and skill, all without modern equipment being available to the carpenters (charpentiers) of the day.
Special markings cut into each beam
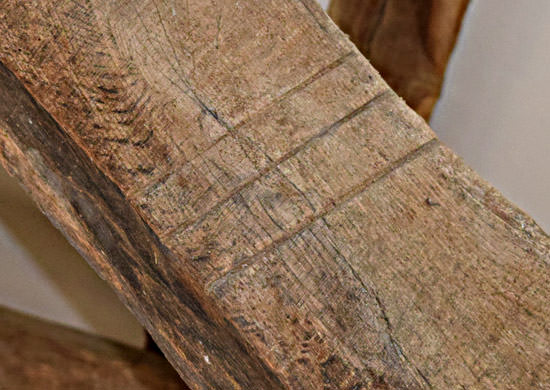
If you look carefully at the beams that form the main triangles, you can clearly see some markings (marquages) that have been cut in the faces of the beams. These are not haphazard (au hasard). They are carpenters’ marks (marques d’assemblage/marques de charpentiers).

They come in pairs so that on the left beam there is something like a letter “N”, then “III”, and on the right beam there are just the three markings that make “III”. Here they are close-up:


What the carpenters did
These markings work in pairs. On one pair there is NI and I. On another pair there is NII and II. On another there is NIII and III. On a fourth pair of beams there is NIV and IV.
We need to think of these are being the Roman numerals I, II, III, and IV, for 1, 2, 3 and 4. Then we need to understand that one of them has its number prefaced with a letter N. These symbols identify pairs. So “N + III” is the pair to “III”. These two fit together (s’emboîtent).
This makes sense when we appreciate that the carpenters began their work on the ground, with beams and posts lying horizontally, lying flat on the ground. They cut them to length, shaped them, cut the joints and made sure they fitted together properly. Then they marked them using the above code. Then they dismantled (démanteler) everything. They they carried (porter) the timber into the building, lifted it into position, assembled it, then pinned it together.
So everything we now see in its vertical, ‘upright’, position, began by being assembled on the ground. These codes identified which piece belonged in which position.
Recognising craftsmanship
So next time you are lucky enough to see the inside of a roof structure like this, take a close look for markings like these. If you see some, you’ll be able to explain this craftsmanship (artisanat) to your friends.
Links
A brief introduction to traditional timber construction.
Timber-framed buildings and roofs.
A lovely collection of instructions for constructing traditional wooden roofs.
The history of timber framing. Near the bottom of this page is a description of the parallel line marks used to mark pairs of timbers!
A splendid collection of photographs and drawings of carpenters’ markings on Google.
More photographs and drawings, this time from Google France.
